
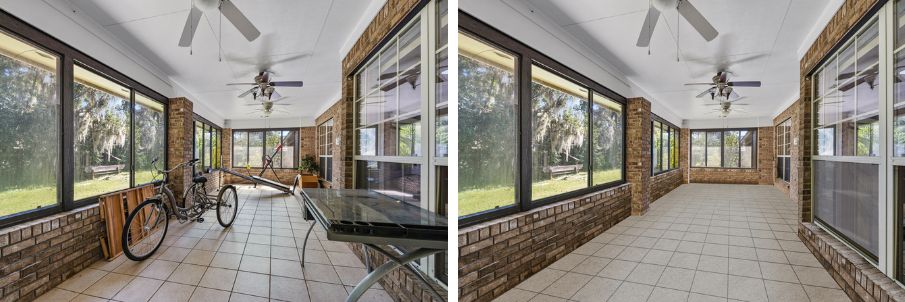
In real estate photography, taking a beautiful photo is the first step – retouching is the “secret” to turning a photo into a powerful marketing tool. Not just stopping at basic light and dark adjustments, advanced real estate retouching requires meticulous attention to every detail: from smoothing the wall surface like the skin smoothing technique in portraits, to handling glass, metal and light. This article will help you explore the entire advanced real estate photo retouching process to make real estate photos both natural and classy.
What is Real Estate Photo Retouching?
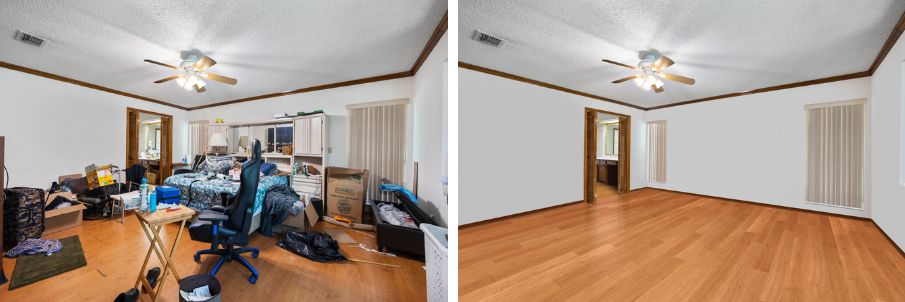
Retouching in real estate photography is a post-production process to remove defects, refine lighting, clean up the space and enhance the aesthetics of the image.
Unlike portrait retouching, which focuses on skin and face, real estate photo retouching focuses on:
- Smoothing interior surfaces (walls, ceilings, floors).
- Complex lighting and shadow processing.
- Preserving the material texture, ensuring the photo remains true
Professional Real Estate Photo Retouching Process
1. Prepare RAW File
- Import RAW images from the camera into Lightroom or Capture One to ensure full data, widest range of light.
- Sort & quickly evaluate (culling): choose frames with good composition, light, limit blur.
- Synchronize metadata: attach project name, location, keywords to manage files easily later.
2. Basic Adjustments
- White Balance: adjust to natural colors, not yellow/blue.
- Exposure & Contrast: balance light and dark, avoid burning highlights or losing shadow details.
- Lens Correction: enable the function to correct aberrations, warping from wide-angle lenses.
- Crop & Straighten: align straight lines (walls, doors, ceilings) to keep the photo steady, avoid distortion.
3. Cleaning Pass – Detailed Cleaning
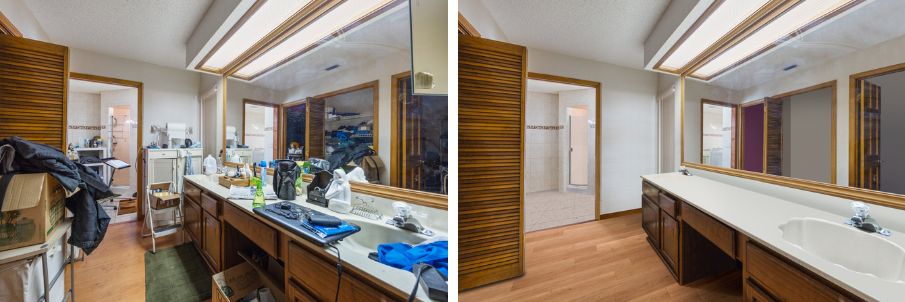
- Dust & Spot Removal: Use Spot Removal/Healing Brush to remove stains on sensors, walls, floors.
- Remove wires, extra objects: small details that cause visual distraction such as cables, trash cans, power outlets.
- Fix unwanted reflections: on glass, mirrors or glossy surfaces. Can use Clone Stamp/Healing combined with Dodge & Burn.
4. Detail Pass – Advanced Detail Editing
- Frequency Separation: smooth walls, ceilings while retaining natural texture, avoiding the “plastic” feeling.
- Retouch glass & metal: make glass doors transparent, increase brightness, remove stains or color bleeding on stainless steel/metal.
- Balance shadows: brighten dark areas that have lost detail, keep natural light.
- Texture Enhancement: slightly increase clarity, sharpen important details (wood grain, granite, interior).
5. Fine-Tuning – Finishing & Creating Mood
- Color Grading: synchronize the color of the entire photo series (blue-yellow tone, or neutral depending on the portfolio).
- Adjust selective color: ensure the interior color (wood, sofa, curtain) is true, not out of tone.
- Luxury Tone: use light grading (warm, luxurious) to increase the high-end feeling, suitable for the project style.
- Consistency check: place photos side by side to ensure color and light synchronization before publishing.
6. Export File & Handover
- Export format: JPEG (sRGB, 90–100% quality) for web, TIFF/PSD for printing or archiving.
- Resize: optimize size (2048px – 4000px) depending on the purpose of use (web, portfolio, brochure).
- Backup: save the original RAW file + retouched file for easy editing in the future.
Real Estate Photo Retouching Technical Checklist
| Step | Technique | Main Tools | Notes |
|---|---|---|---|
| General Cleaning | Remove unwanted objects, dust | Clone Stamp, Healing Brush | Avoid over-removing, keep it natural |
| Skin smoothing for interior | Frequency Separation | Photoshop | Keep texture, avoid over-smoothing |
| Retouch glass & metal | Cleaning & Refinement | Clone Stamp, Healing Brush | Focus on small details |
| Light control | Dodge & Burn | Photoshop | Maintain depth, avoid flatness |
| Perspective correction | Lens Correction | Lightroom, Photoshop | Balance the space |
| Sky replacement | Sky Replacement | Photoshop, Luminar | Match sky with original lighting |
Advanced Real Estate Retouching – Advanced Techniques You Need to Know

Skin Smoothing for Interiors (Surface Smoothing)
- Apply frequency separation to smooth the surface of walls, ceilings, and floors.
- Remove stains, small scratches, or noise while maintaining texture.
- Make interiors look “newer” without looking fake.
Retouch glass and metal (Glass & Metal Refinement)
- Remove stains, fingerprints, and dirt from glass doors and mirrors.
- Use Clone Stamp and Healing Brush to clean metal (doorknobs, railings).
Control light and shadow
- Use Dodge & Burn to balance uneven lighting.
- Remove harsh shadows while maintaining depth.
- Highlight important points to guide the viewer’s eye.
Lens Correction & Perspective Fixing
- Fix distortion caused by wide-angle lenses.
- Adjust vertical lines with the Transform Tool in Photoshop/Lightroom.
- Make the space more balanced and professional.
Sky & Window Retouching
- Replace the sky (Blue Hour, Golden Hour) to make the photo pop.
- Retouch the window to show the details of the outside landscape without overexposing it.
Conclude
Advanced real estate retouching not only makes the image more beautiful but also increases the value of the property. At Kolorheaven, we apply detailed editing techniques – from lighting, perspective to sky replacement – to bring luxurious images that convince customers at first sight.